i3D 2020 - Running the posters session (and a bit of streaming)
2020 was so far quite a weird year for me and everyone around me. Virtual conferences are now the only format that can work with our international scientific and industrial R&D community. The current trends in mitigation of the global pandemic are pointing to at least another year of social distancing preventive measures in place. Having that in mind and the fact that we might see even more virtual conferences in the future, I think that sharing our experiences and lessons learned with the rest of the research community is paramount to running smoothly such events. Given the immediacy of the current events and relevance of the issue, I also choose to use the format of a blog post, which will allow me to forgo some of the typical science lingo used in our community. Furthermore, it avoids the inevitable delays and heavy redacting which are part of the lengthy publication process in academia setting.
i3D is a symposium on interactive graphics and one of the premier places giving venue to speakers to present their work on this topic. Our conference is sponsored by ACM SIGGRAPH and takes place annually since 1987, and never before virtually. Our experience of running virtual events was quite limited and we gathered as much information as we can find from prior events this year. Here is a good time to thank Cem Yuksel and Pierre Moreau for the useful pointers about how they run the HPG conference. Overall, we had just a few stumbling blocks along the way and we made sure to remove any issue that we spot in the following days of the conference. Streaming duties were split almost equally between me and Sheldon Andrews. We had initially a different steamers line up, but we needed to quickly alter our plans because of positive COVID probe of one committee member’s relatives. Having multiple options for that important role is one of the first things that needs to be done.
Streaming and communication
Video streaming is the most integral component of virtual conferences and I had a chance to take control of this aspect of the conference over two entire days, apart from the posters session that I will discuss separately. We used YouTube, and OBS for video compositing. I organized the content in advance for each day (Tuesday and Friday) in a linear fashion, where each scene represented a separate event or a possible transition screen. Not all scenes were used, since we often went directly from the welcome speech into the Keynote, but, nevertheless, I prepared additional scenes just to be sure. You can see a screenshot below.
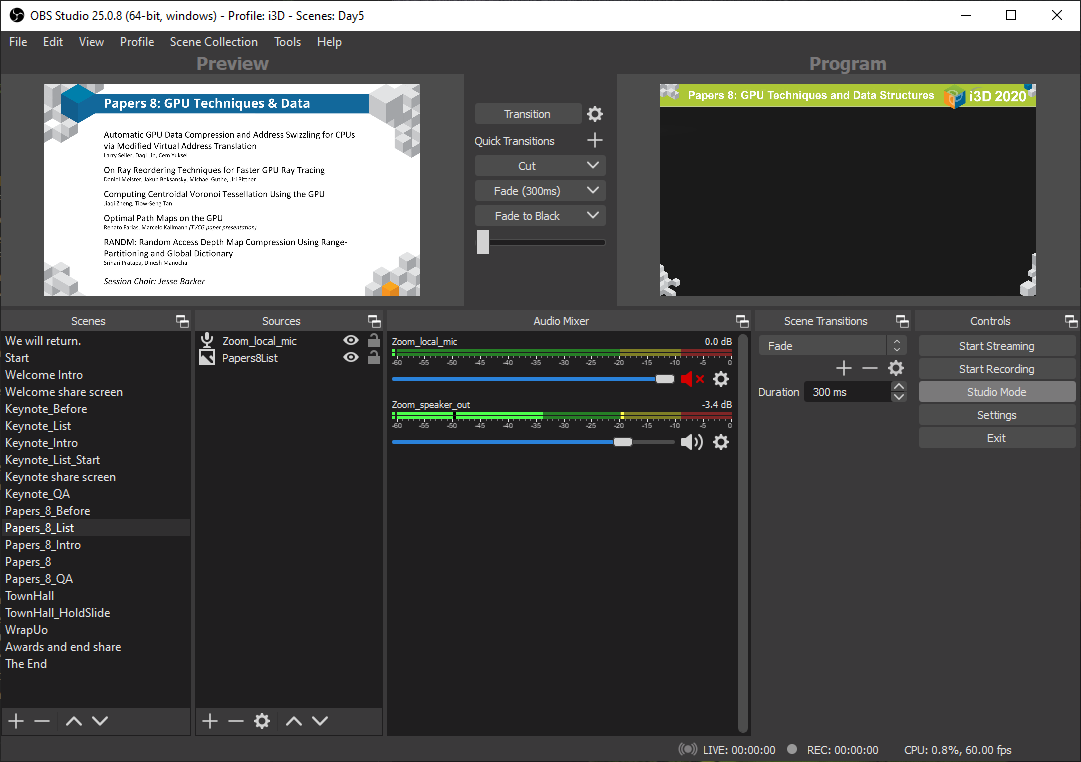
Transitions between different scenes were done through the OBS studio mode which allows a few quick changes to be made before showing the scene on screen. Overall, that helped to fix some misalignments in the window capture cropping, so it is a very useful feature.
We relied on Zoom to arrange the actual callers and also for screen sharing presentations. Initially, we used maximized view of Zoom, but I had enough monitors in my setup to dedicate an entire monitor for Zoom (2 regular + 1 wide), so on Friday I actually used fullscreen Zoom. One thing to pay attention in OBS is that the regions might get moved in the prepared in advance scenes between application restarts. Fullscreen mode also allows you to have the chat and participants on a separate screen which leads to more optimal use of your monitor setup and greater video quality.
The usual session proceeded as a set of predetermined steps. We had an intro section before the presentation, when the session chair introduced all the authors. Then the pre-recorded presentation were played back. We ended the session with a panel-style Q&A. The main advantage being that it is easier to collect more questions for the authors and it is easier to manage. Before going live we had 3-5 seconds countdown. The host of the video stream had his microphone muted on stream to allow him to give instructions without being heard on stream. We had to repeat a slide during a keynote because Zoom froze and often the instruction to start talking overlapped the moment when people were shown on stream, so I think that it is an important part of the setup. It was accomplished by simply muting the microphone input. Both me and Sheldon used Blue Yeti mics that had builtin audio adapter, so we set the audio to be outputted to them from Zoom, and the system audio was set to the builtin audio adapter on our laptops. That allowed us to choose between either of them depending the scene. Videos had system audio on, but Zoom audio off, and the opposite setup was set for Keynotes and Q&A sessions.
Playing back videos was generally accomplished with VLC. The main idea being that you can start in the middle of the video, if something happens. In our case it didn’t help with the videos that we received with sound issues, because we needed to re-encode them. However, it certainly helped to get a sense of what is wrong. Generally, my advice to anyone using pre-recorded videos in the future is to re-encode them and fix the audio balance because it can differ wildly between videos and some might have very low-quality audio. We used a playlist in VLC with the original videos and padded them in the front and back with additional slides to avoid cutting from the front of the video or sudden cut to the VLC logo. It does not take that long to splice the videos and those slides (around 20-30 minutes on ny laptop that has RTX 2060), so I think that you should consider that route instead. On Day 5 we had issues with two of the videos which were probably recorded in a similar software that lead to the audio breaking between slides, so I was forced to replace them in post. During the stream, Sheldon re-encoded them on his system, then we switched to his setup to play them back, and afterwards we switched back to my machine as primary streaming source. Everything was achieved by coordinating the switch over Zoom and then stopping streaming from OBS on one PC and starting it on another and using the same stream key on both systems. The same kind of switch we had on Wednesday when I hosted the posters session directly from my PC.
Keynotes were done completely live. We used screen sharing in Zoom. However, a few things had to be setup to ensure smooth video. When sharing the screen participants had to check the “Share computer sound” and “Optimize Screen Sharing for Video Clip” checkboxes to ensure optimal performance. Another thing to consider is that everyone had to disable their system sounds and notifications on Discord to avoid sounds from other applications to interfere with the conference.
The posters session
Posters were handled very differently from the rest of the conference. We had a pre-recorded fast forward session the first day. The main motivation being that it will be logistically too complicated to keep the audio in sync while the authors are talking over their video. The appeal of having a fully live fast forward is a bit more questionable, it might give more time to the authors to settle on their speech, but ultimately the delivery is going to be subpar because of the technical limitations, so we never considered it as a viable option. We gave our authors two to three weeks to prepare this material and everyone was warned in advance that we will require it at some point in time, so we never had issues with that part of the presentation.
The fast forward videos were prepended by a short instruction how to access the posters gallery. My setup in my apartment is shown below.
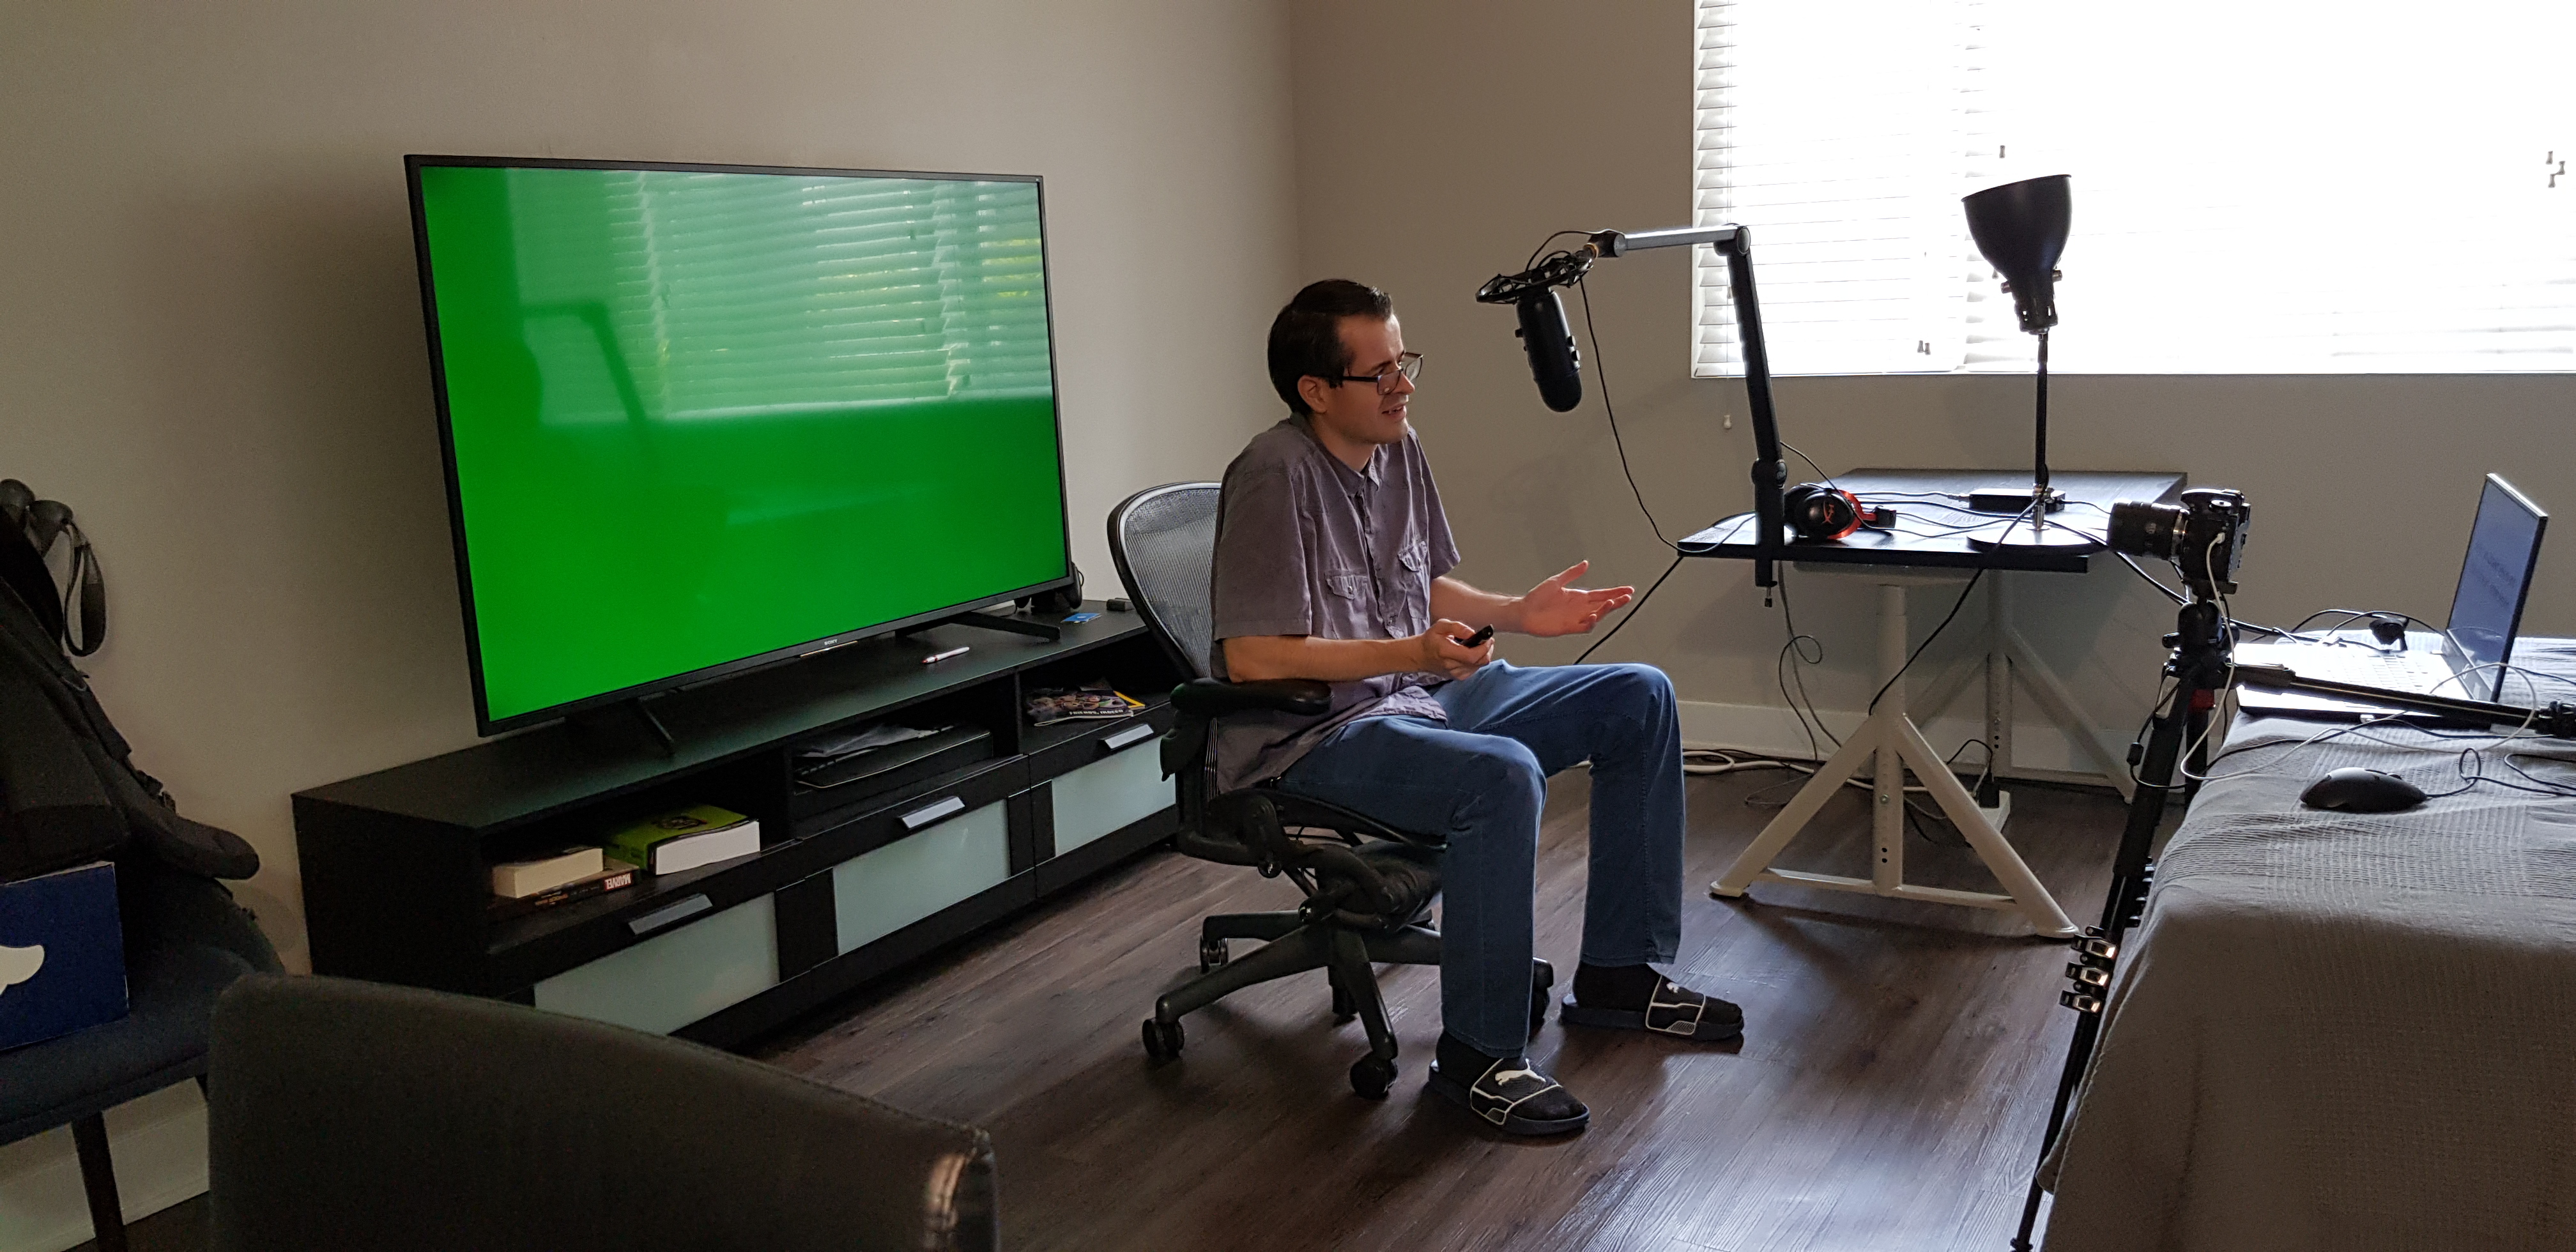
I made a very simple green screening setup at home. I had a Blue Yeti microphone attached on a boom arm which I kept just away enough from my face to easily remove it in post. The camera was mounted on Manfrotto 190 Aluminium 4 Section Tripod with Manfrotto 496RC2 Ball Head. I owned both for quite awhile and they served me really well and survived moves across three countries. I optimized their placement to allow me to use a long lens. I already owned a pretty big 65" Sony X800G TV which I used as a backlit green screen. One thing to keep in mind is that you might get some reflection of your key lights, so you want to place them in a way that avoids showing them on frame, i.e. the reflection is behind you or off-screen. To crop only the green screen part, I used a Laowa 60mm manual focus lens set at f/2.8. The video was shot at 1/60s exposure time and whatever ISO setting made sense depending on the illumination. My camera is a Nikon D7500 that I connect as a virtual camera using Sparkocam. In the future, I might consider spending some money on a proper video capture card or dongle because the virtual camera setup consumes way too much precious CPU time. I used a clicker and my laptop running PowerPoint as a teleprompter. Green screening and video editing was done in DaVinci Resolve, shown below.
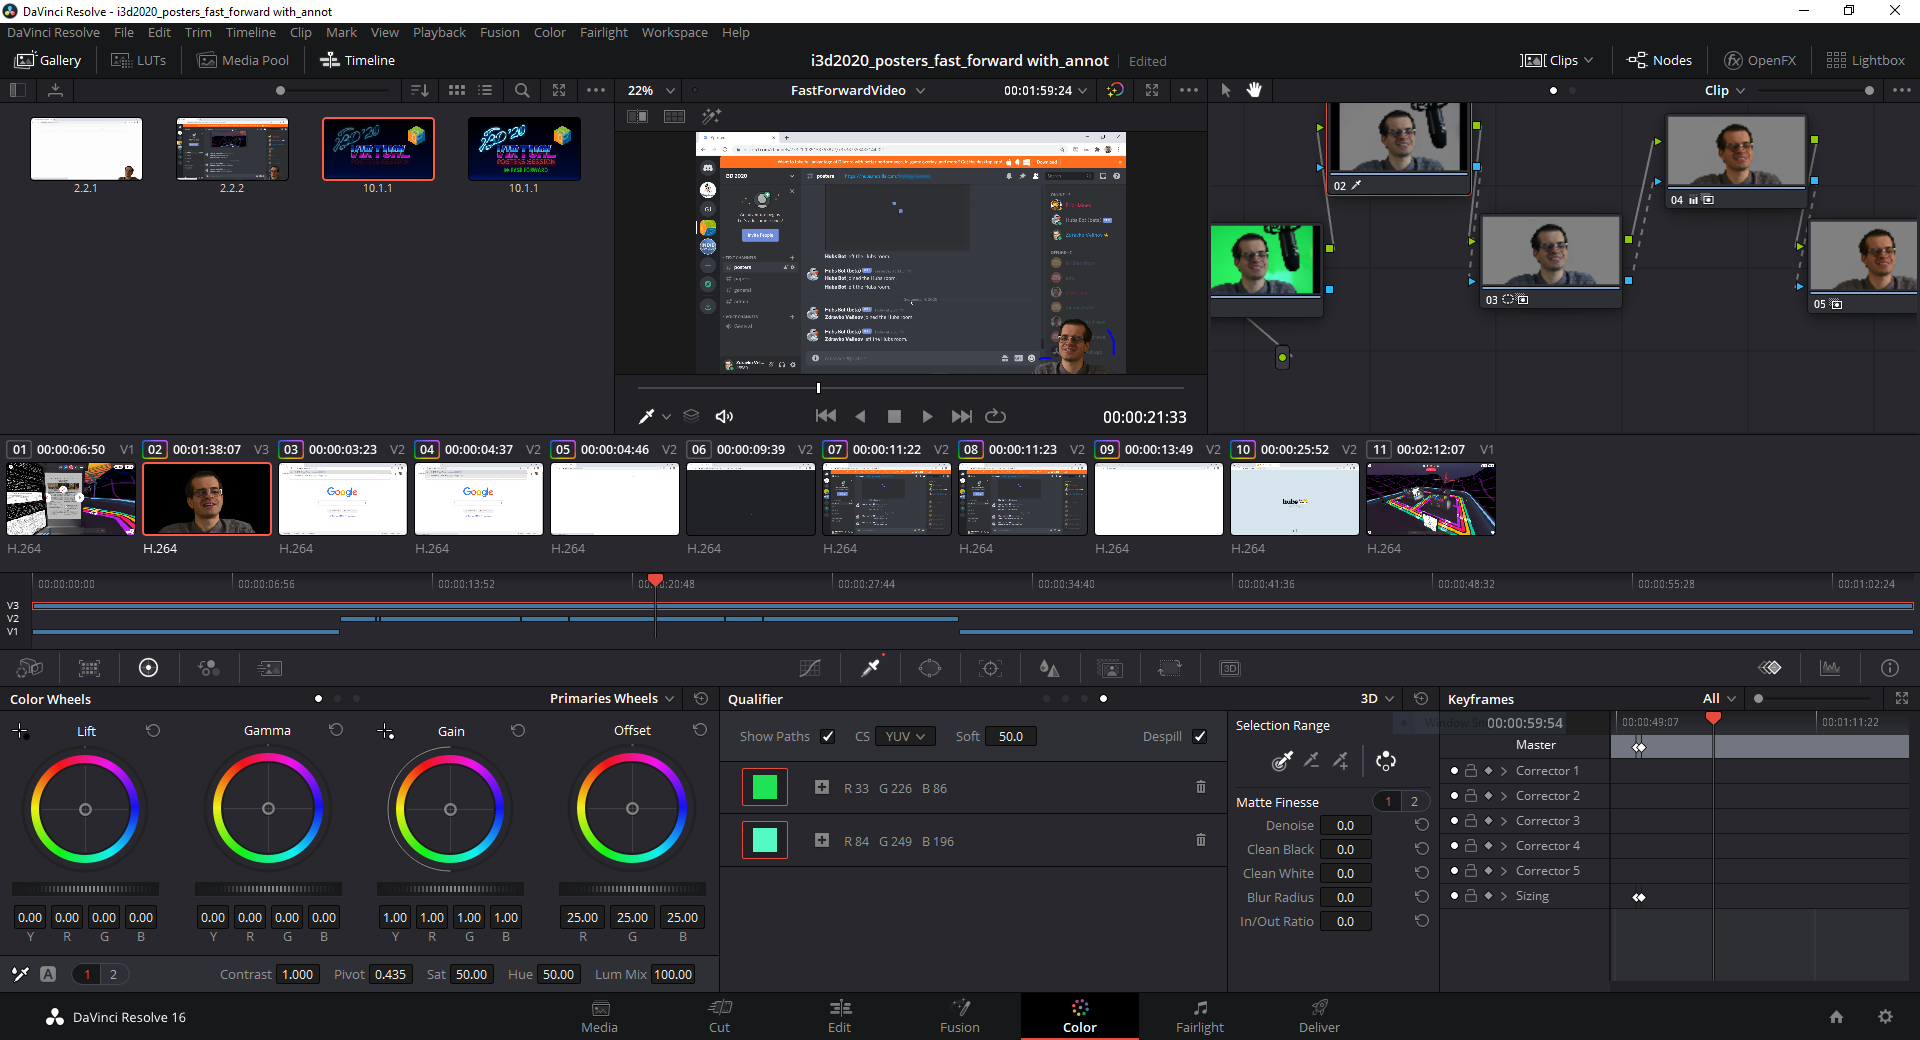
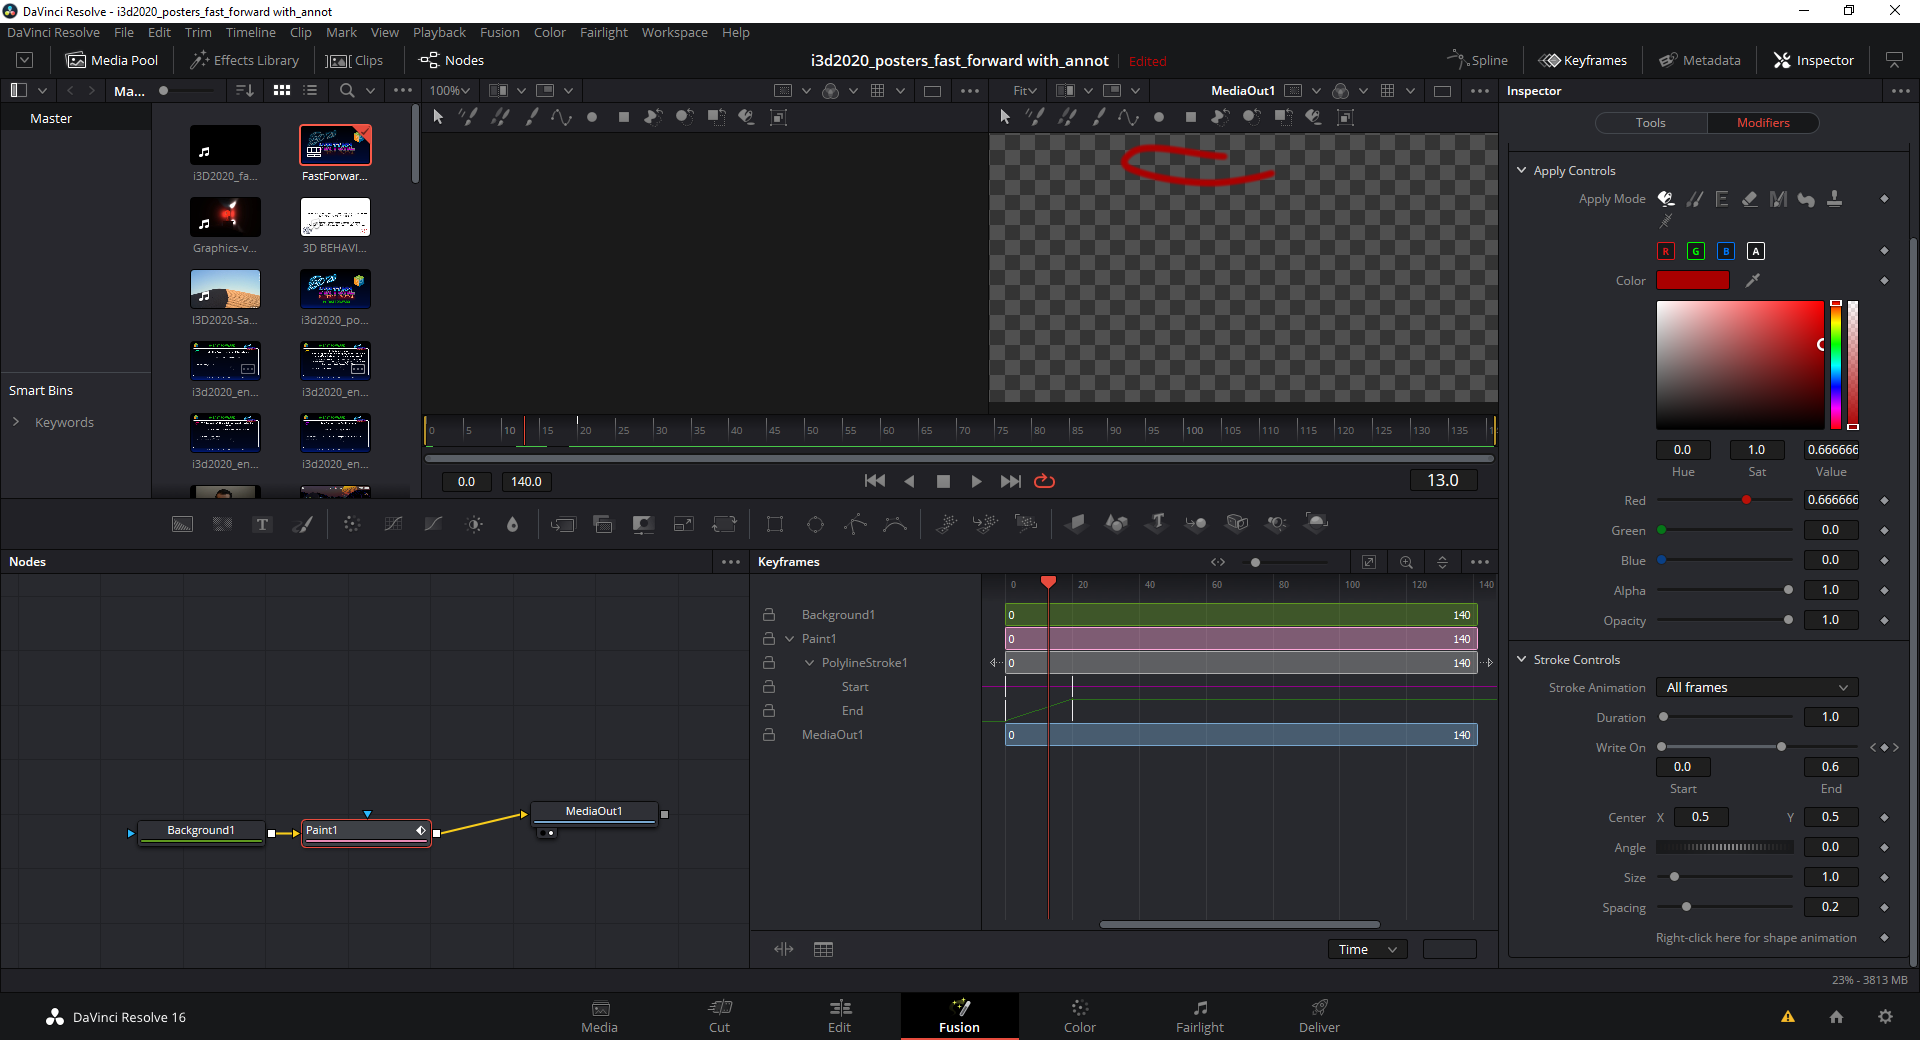
I used the 3D qualifier to pick the background and inverted it with despill enabled. That gave me almost perfect green screening. Then I used a polygonal “window” to select only the relevant parts and mask out anything else. Then I zoomed out the video and applied tilt and pan to place it in the right spot. Finally, I did a little bit of color grading. The video was also mirrored along the X-axis, so that I face the content. I did something very similar for the outro part of the video, I just reframed the camera, so that I face the content from a different angle (see below).
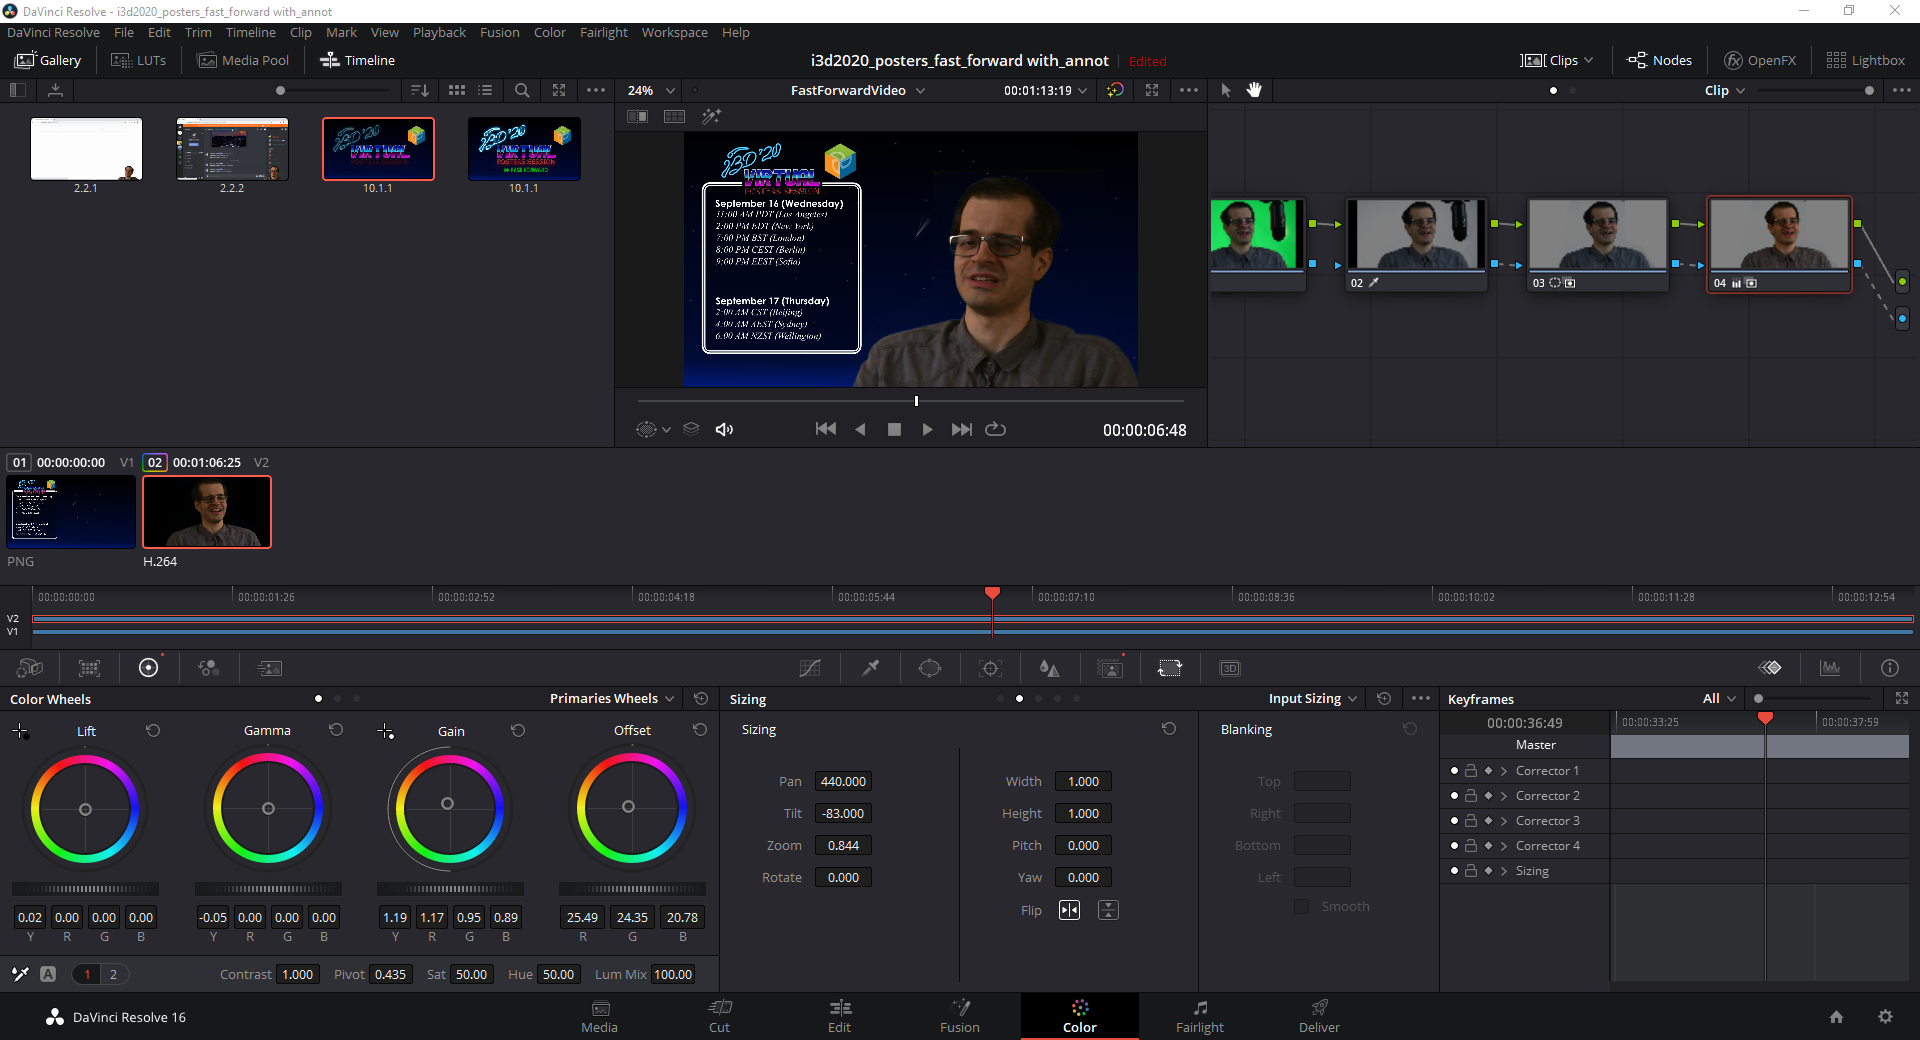
The main point of the intro section was to serve as a mini-tutorial and the outro section provided a reminder about when the session was going to take place. The tutorial videos were also done in Da Vinci Resolve and used animated strokes in Fusion (see below).
The whole video was delivered as MP4 file and then played back after the welcome session directly from OBS.
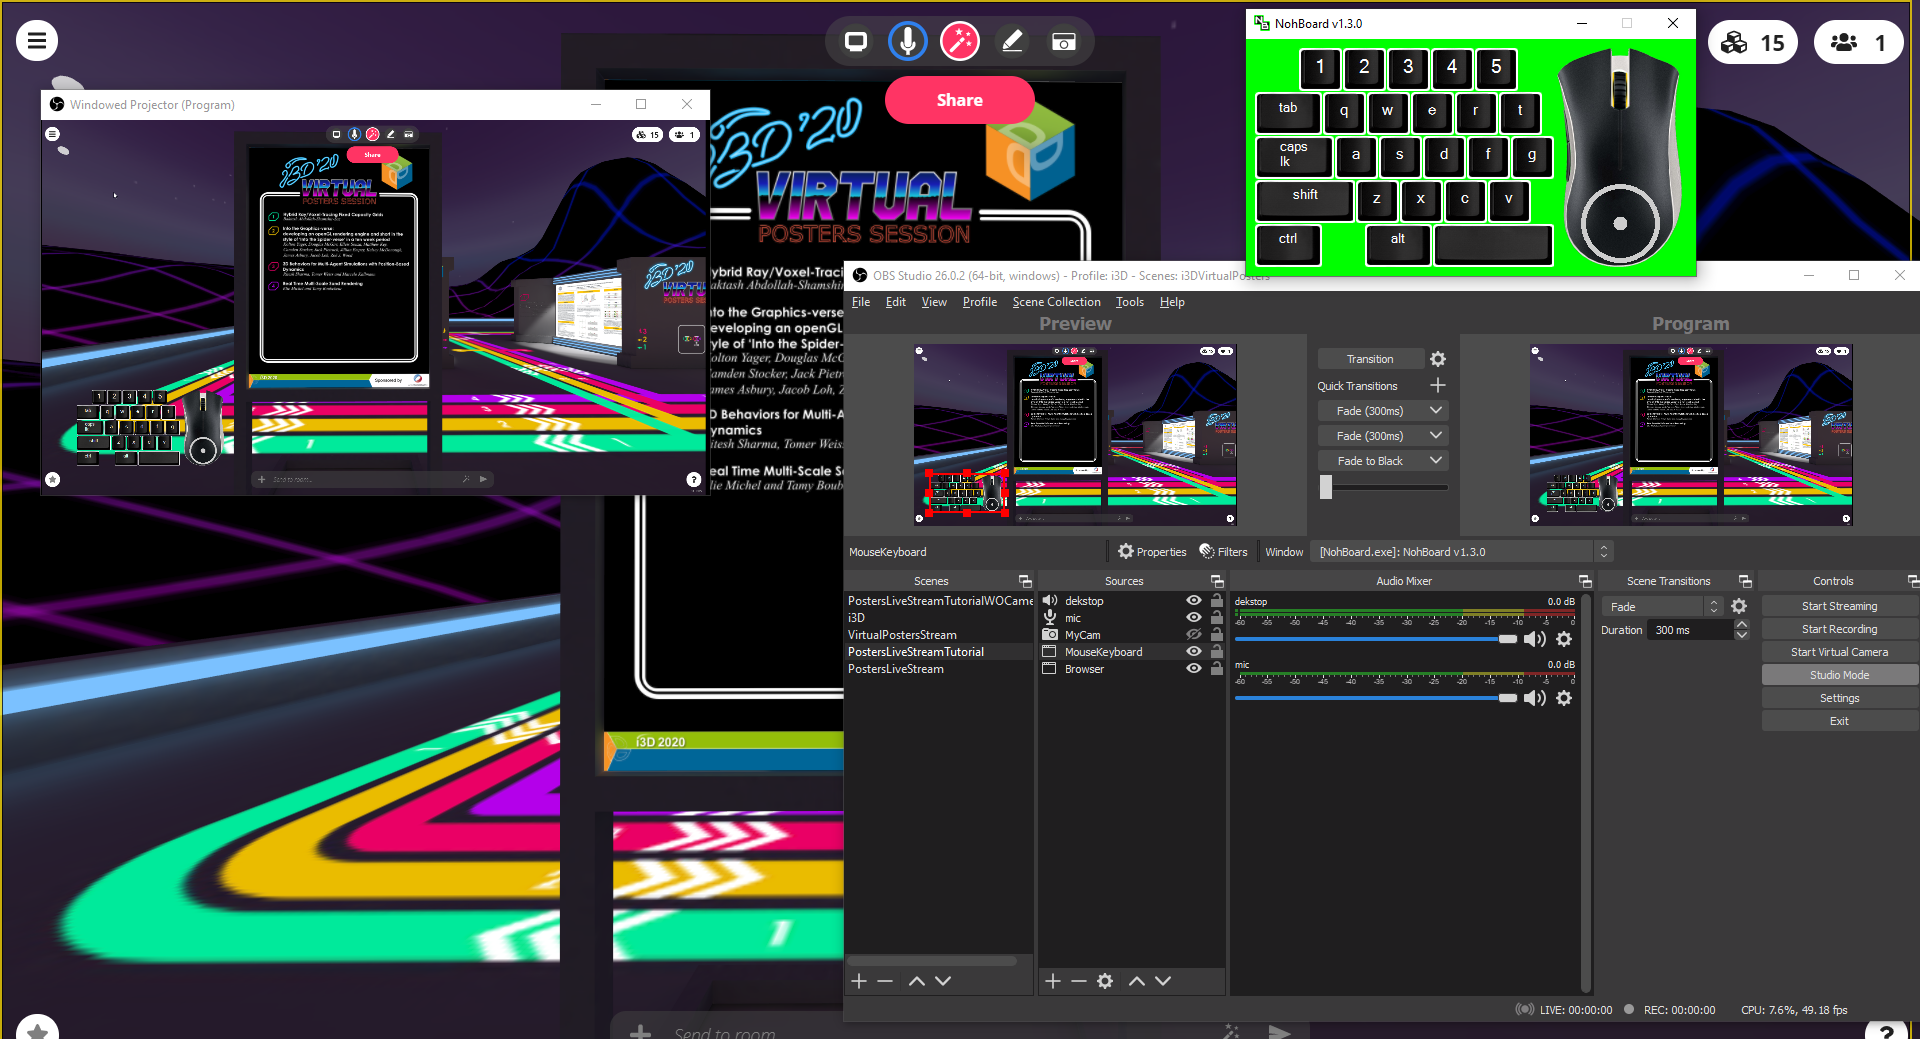
On Wednesday, we had a short tutorial as part of the welcome session. Sheldon was streaming in this case and I did my tutorial by screen sharing a projected window in OBS. I had my keyboard and mouse input overlaid using NohBoard-ReWrite version 1.3.0 in window capture with chroma keying enabled. I used joao7yt / fps / outlined-black_normal-white layout for the mouse and keyboard. Below I show the entire setup.
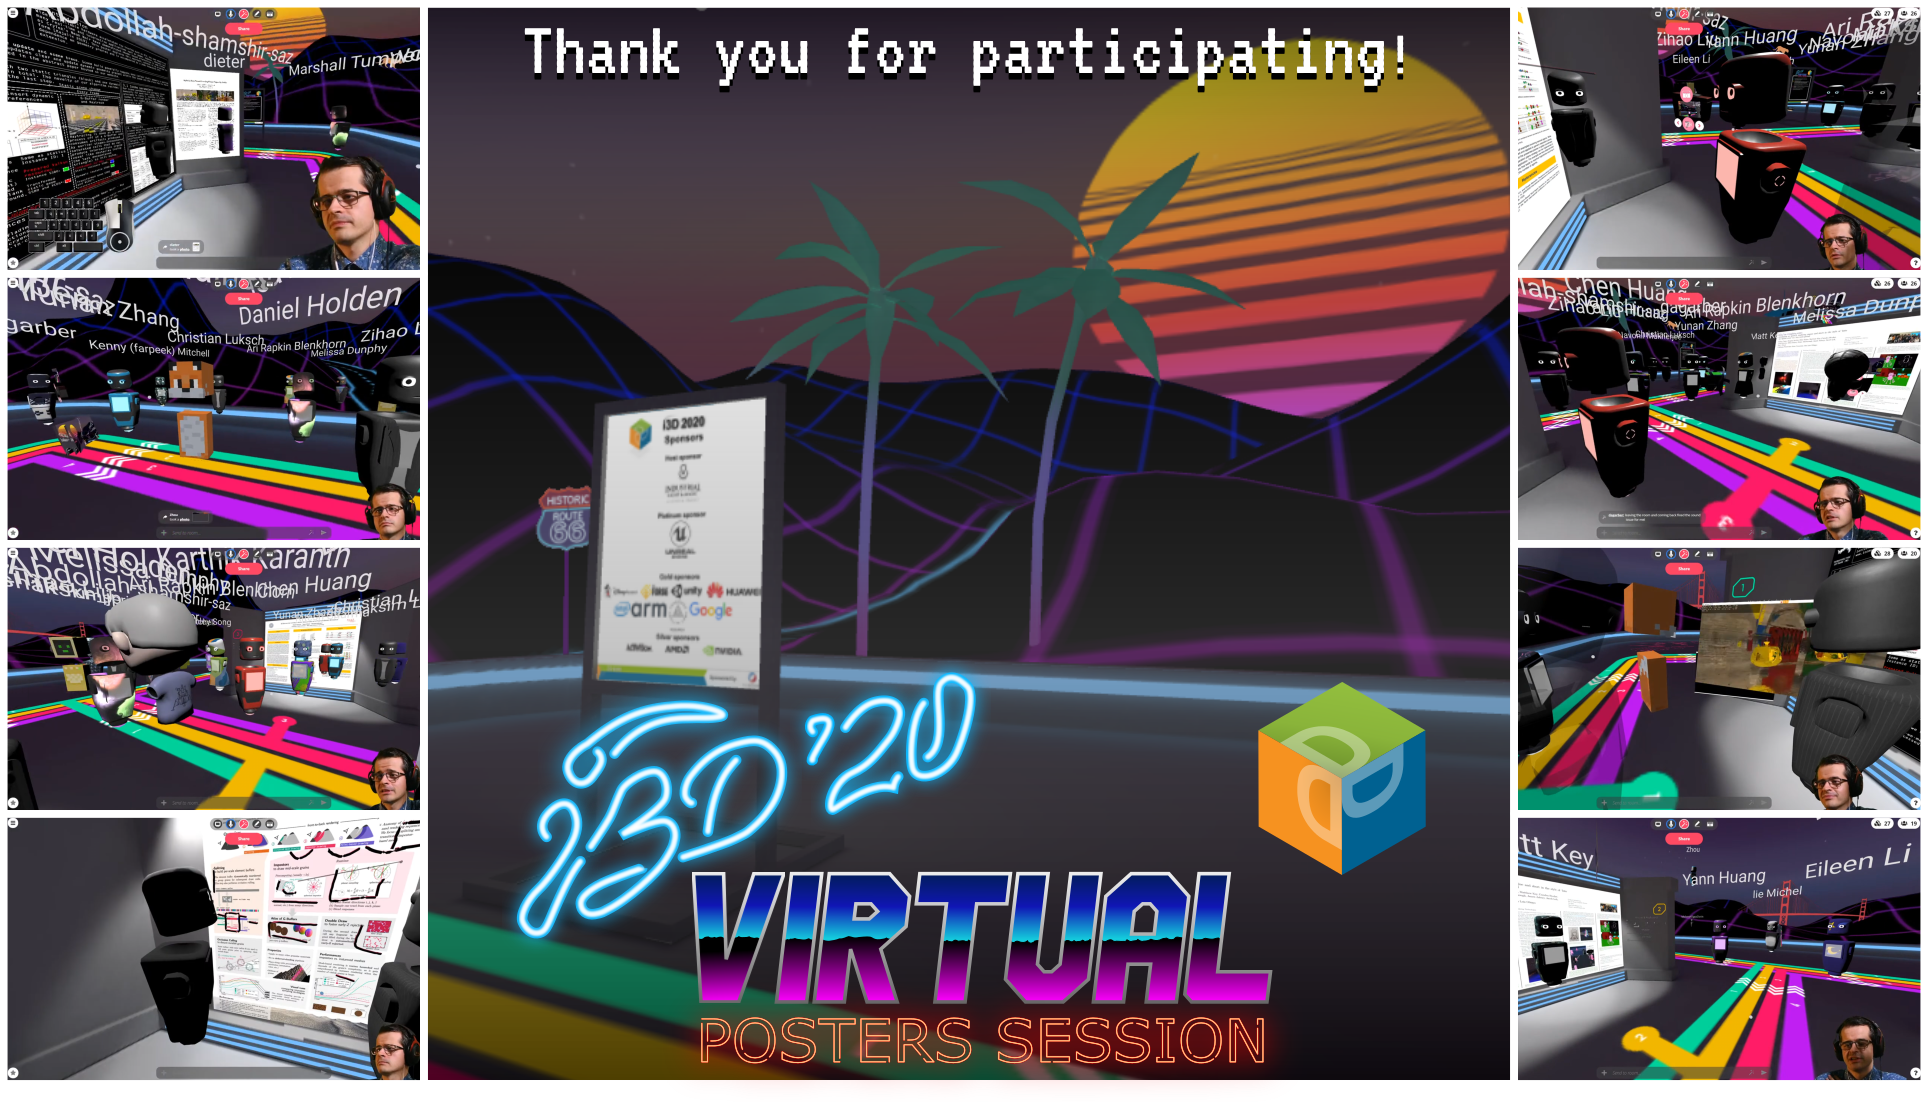
The actual posters session was initiated after a switch between Sheldon’s streaming rig and mine. We used the same stream key and I got the go ahead signal from Sheldon over Zoom. The session had an intro screen which I used to hide the setup that was happening in the background while I was doing microphone checks with the authors. I want to highlight, that I used some Creative Commons music by TeknoAXE. But you can use royalty free music by downloading them directly from the free YouTube Audio Library. We used one of those songs for the breaks between sessions.
We had Discord as a backup channel for Q&A and I initially pointed two of the authors that had issues with logging into the system to a voice channel, but they eventually managed to connect and we avoided the issue. One of the audience members complained about not hearing audio from one of the authors, so it is possible that the author used that channel instead of Mozilla Hubs. Green screening was done using OBS and I did a tutorial during the intro section of the posters session.
Posters were provided only in the gallery because I wanted to motivate the conference attendees to register, so that they can get access to the gallery. We used the Hubs bot to check that people have also connected on Discord, but I quickly disabled its notification functionality by disabling the “Send Message” permissions for the Hubs Bot group in this channel. Many people found it way too distracting.
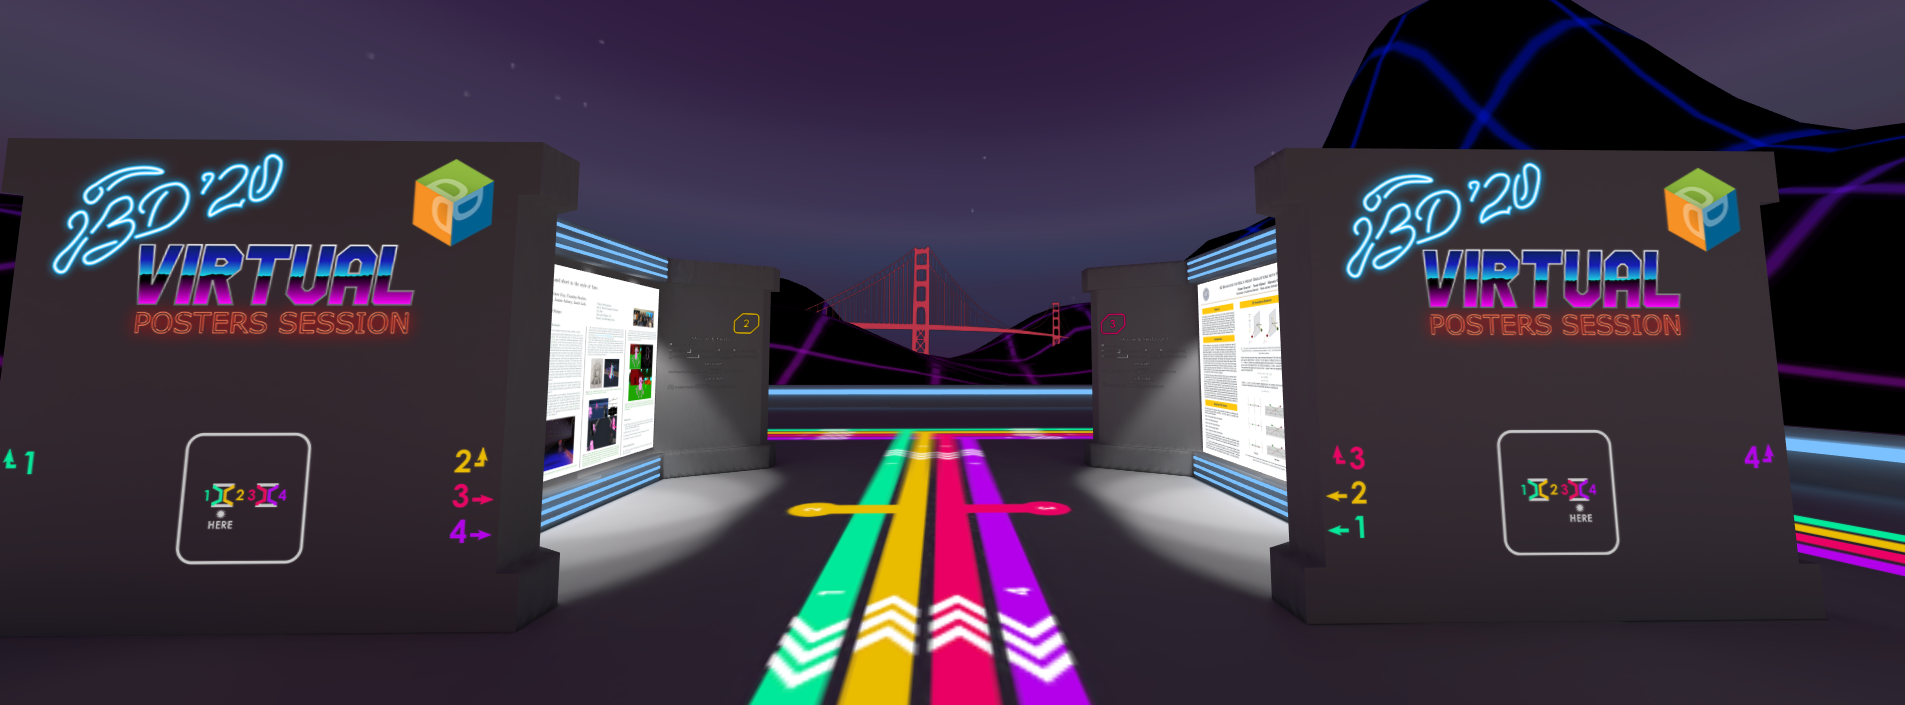
When a conference attendee enters the room, he is immediately greeted by a list of posters.
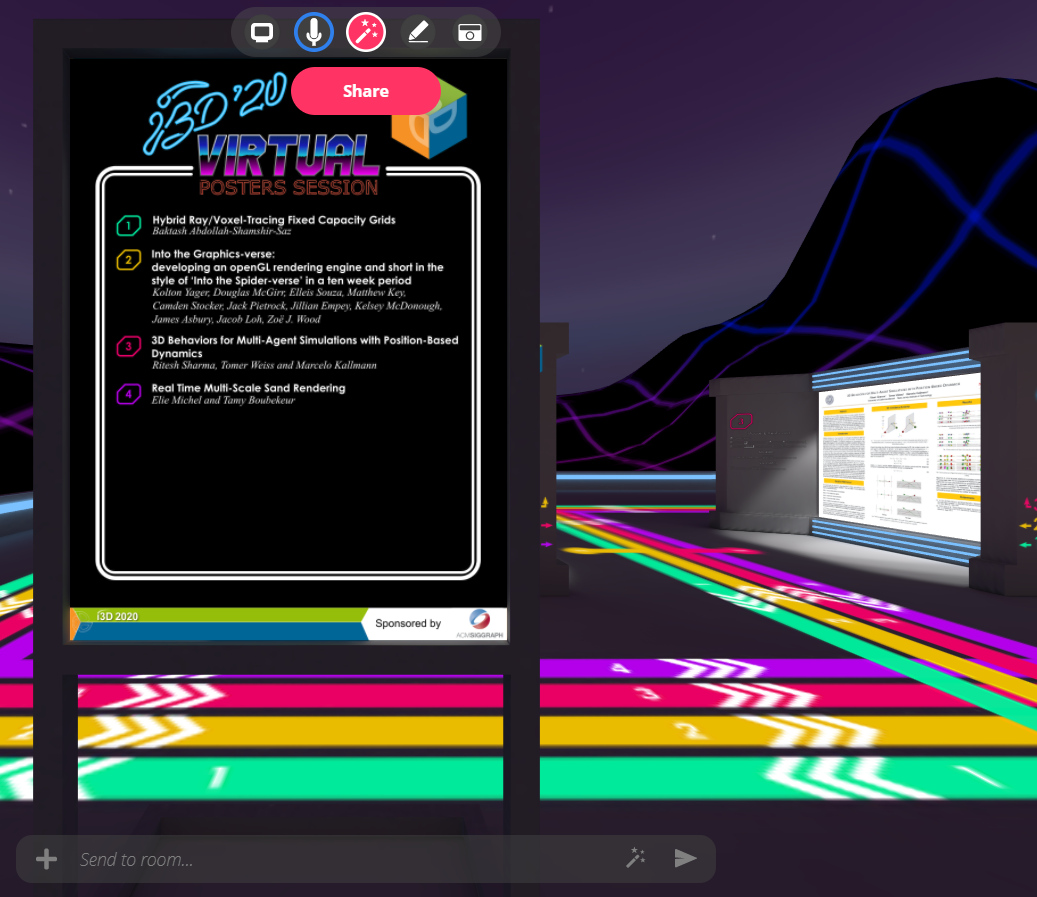
To ease the navigation I color coded each posters number and provided guides on the floor leading to each poster. There was also a map of the entire room. The gallery was built out of standard blocks that I can easily duplicate to create more room for additional posters.

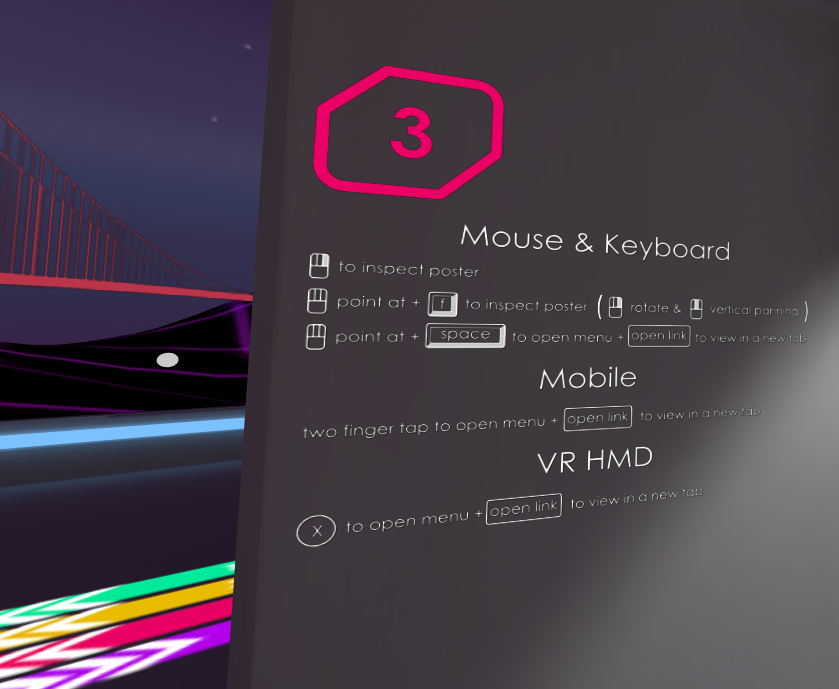
Additionally, next to each poster, there was an instruction how to use Mozilla Hubs because it can be non-obvious how to view the complete poster.
Lighting was completely baked in Blender. I used the denoisers binaries prepared by Declan Russell to directly denoise the resulting textures.
After using Mozilla Hubs to host this session, I have some ideas about how things can run better. It was possible to view the full posters in a new tab using space and then clicking “open link”; however, it will be nice, if Mozilla Hubs gets a better inspector functionality at some point in the future. Another complaint was that there isn’t a loud speak functionality and no control over the radius of the proximity audio. Another thing that will be nice to have is a faster way of snooping on other peoples conversation for moderation purposes. One speaker did a live demo using screen sharing, however it seems that anyone can move that window and it takes time to set it up in the first place. It will be nice if there is an option to install affixed screen sharing walls in the room and give permissions only to certain speakers to use them. I noticed that pictures are shown as two-sided billboards, but most of the time we need only one-sided ones, which is going to have much better performance. I also did a lot of culling of objects by hand and the performance overall is not great. There is definitely plenty of room for performance improvements, i.e. implementing sorting the objects by distance and culling. Another thing that will be nice is to be able to export objects with transparencies using GLTF.
Theming the room
Technical aspects aside, having just a regular room in Mozilla Hubs to show the posters is fine, but maybe something more can be conveyed. What we missed out from the physical conference is visiting California and San Francisco, in particular. I lived in LA at the time, so that is a bit far for me and I did not find the idea of going there in the middle of pandemic and mass protests to collect ideas particularly appealing. So I first started from generic vaporwave theme because as a style it is not particularly visually demanding, it can work anywhere, and I do not need to spend excessive amounts of time drawing the low-poly art. What I wanted is a mini-version of California and the surrounding area. Something to remind me of that time when I spent my time furloughed from work for a half-year exploring the nearby outdoor areas every few weeks. It surely passes as the longest “vacation” that I ever had. Before that I was always chasing degrees, hammering code for that one project that had great potential in my mind or just working in the industry. But now I was left without much active projects and most of the things that I was working on gated in company-owned machines that I was not allowed to access. Exploring made sense as long as it is outdoors, away from the crowds. Thus I started transforming the area as a metaphor of what I have seen. After all, I worked as an Imagineer, it is part of the work and what the American entertainment industry produces at large.
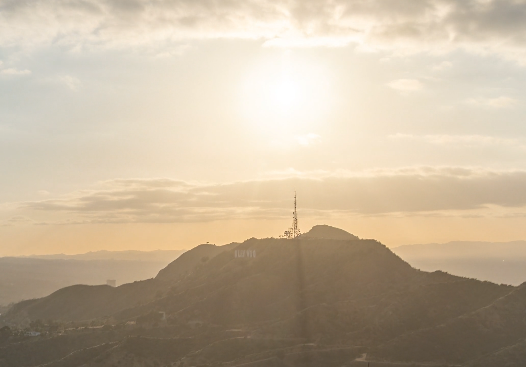
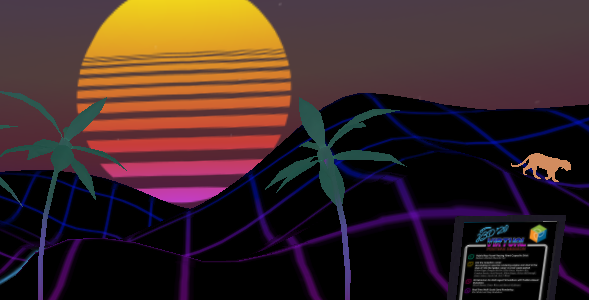
If you look towards the Hollywood Hills from Mt. Hollywood, you can see the Sun setting nearby. I did not want the Sun to set over this area, so it is actually looking in the opposite direction. Meaning that the Sun is rising. I skewed a bit the world directions to fit the content, but at least that was the initial intent. The palm trees should pretty much remind everyone of LA, but I also added a cut-out of another star. P-22 is the mountain lion that lives in Griffith Park, known for eating a Koala in the LA zoo and getting poisoned and recovering on another occasion, and posing underneath the Hollywood sign. I added this one, after I went one night to Mt. Lukens and everyone was saying that I got lucky that I was not eaten by a mountain lion.
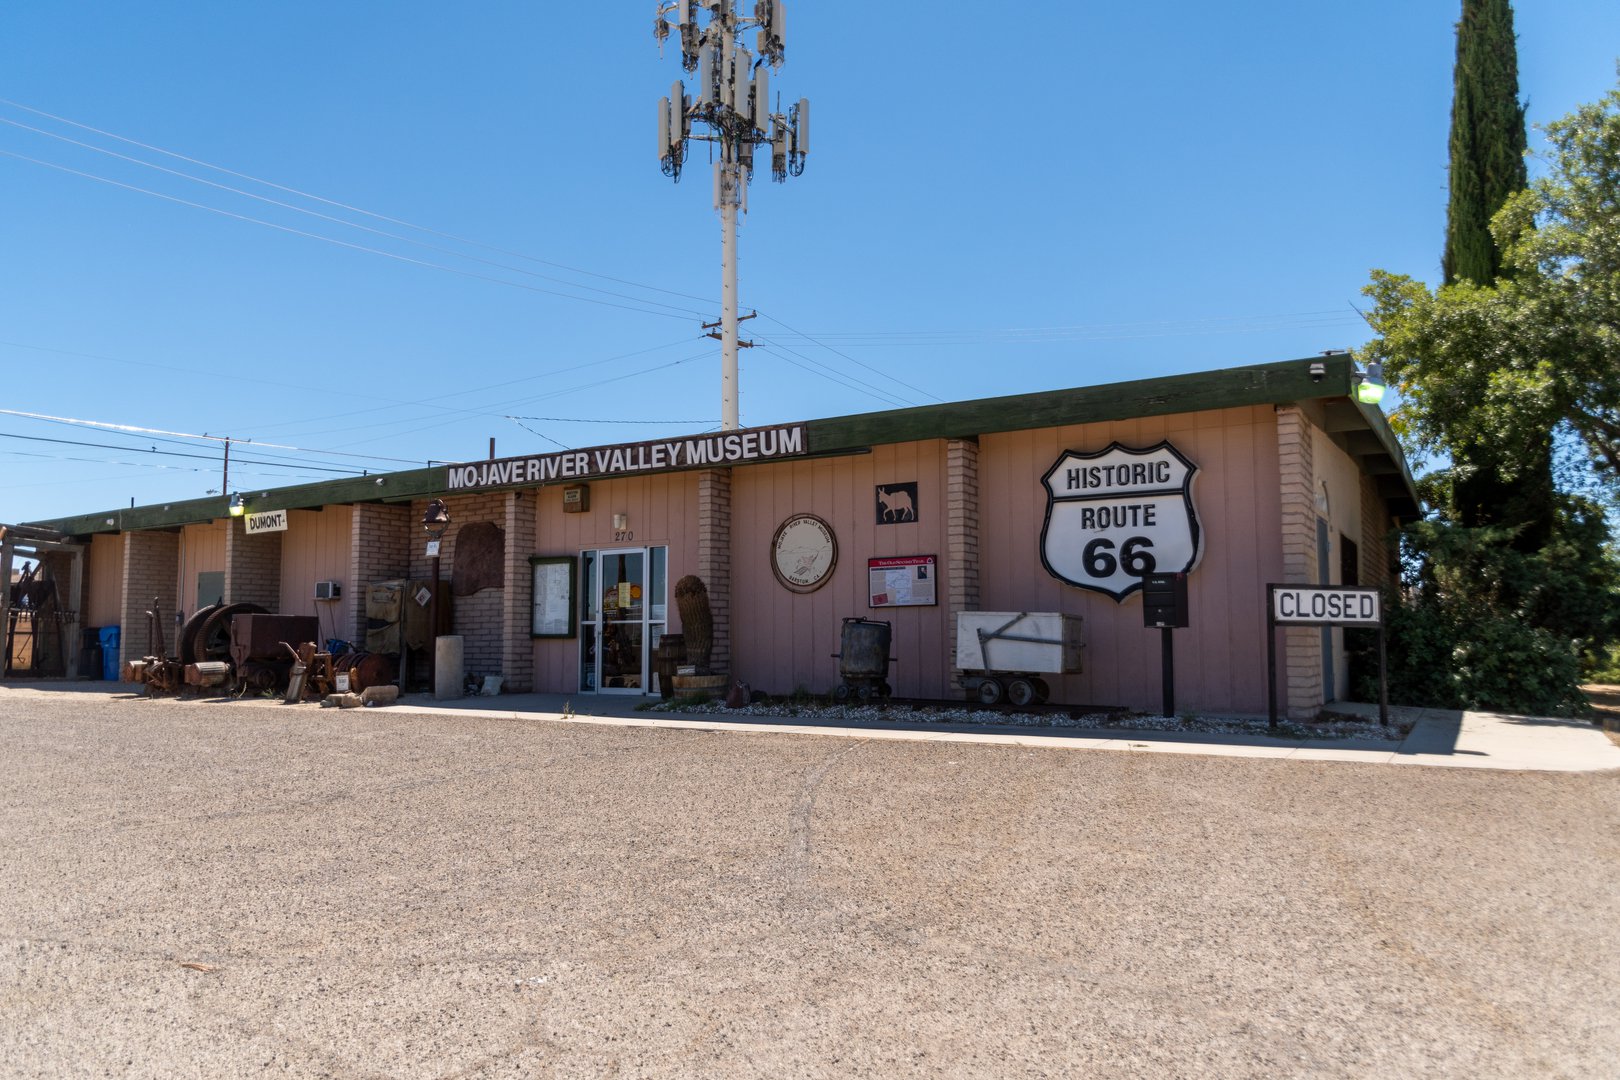

Moving to the side, US Route 66 and the towns surrounding it is a significant part of American culture. It starts in Chicago and ends at the Santa Monica pier. It signifies the pursuit for a better life of people migrating west. I found it somewhat relatable to my experience. I actually visited some of the places along the iconic route in California.
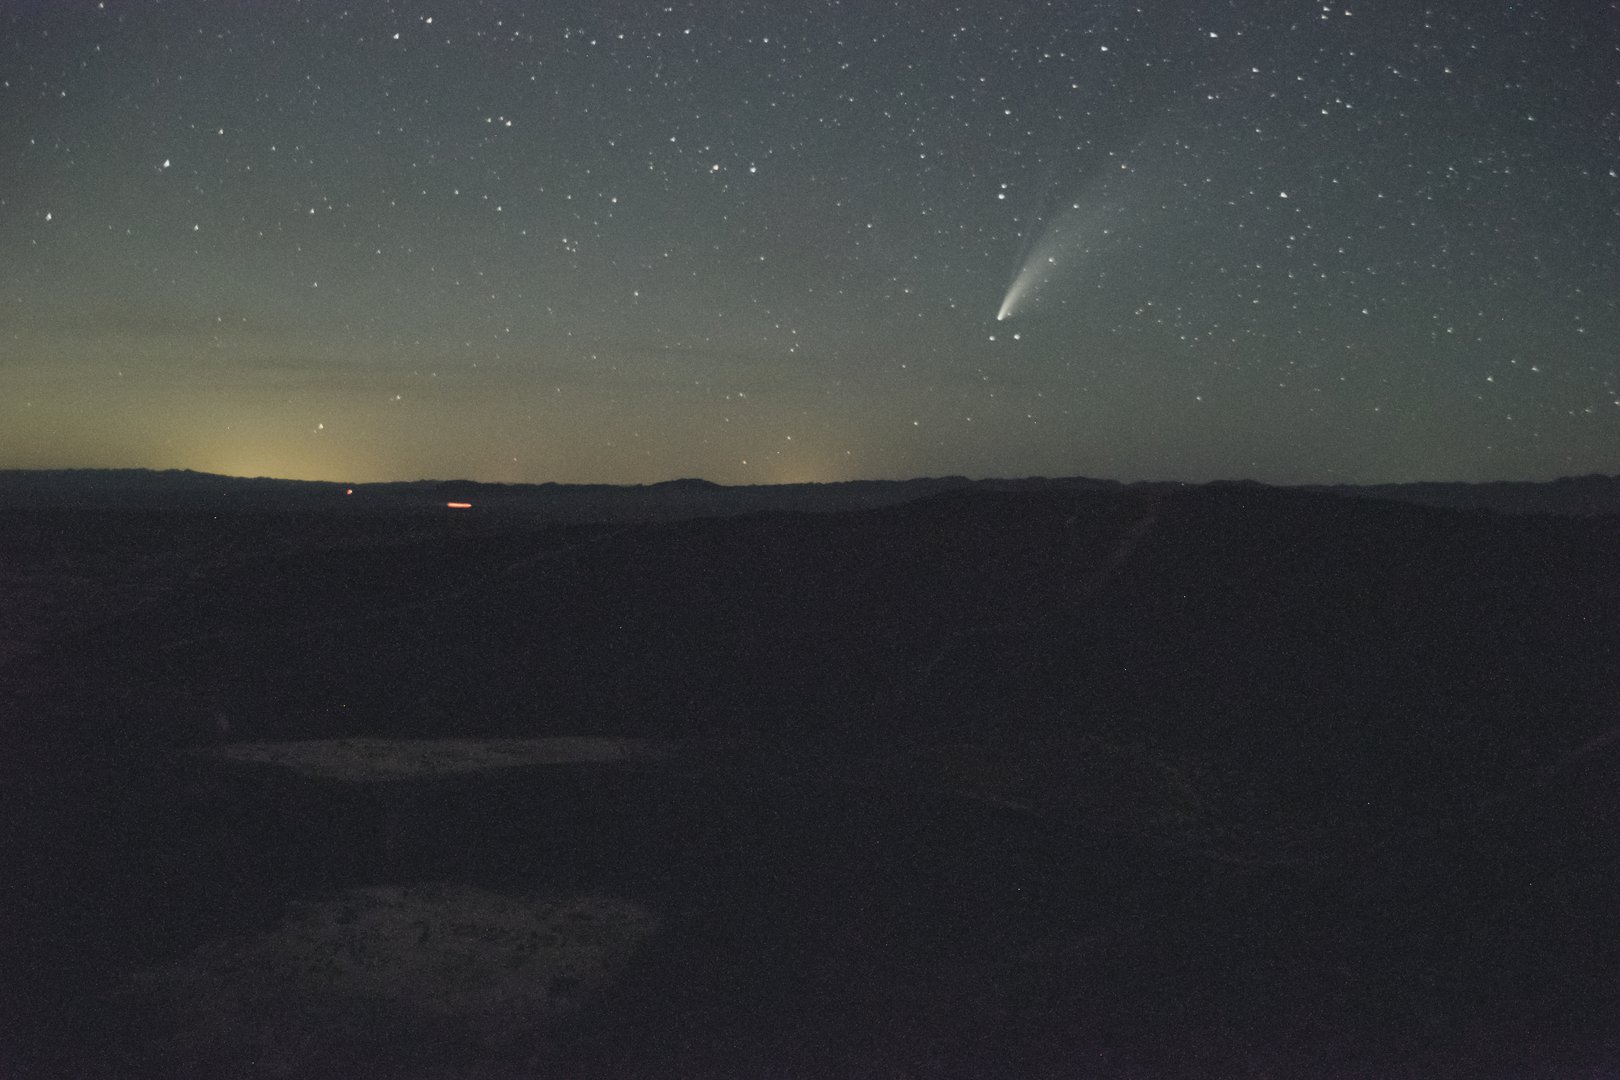
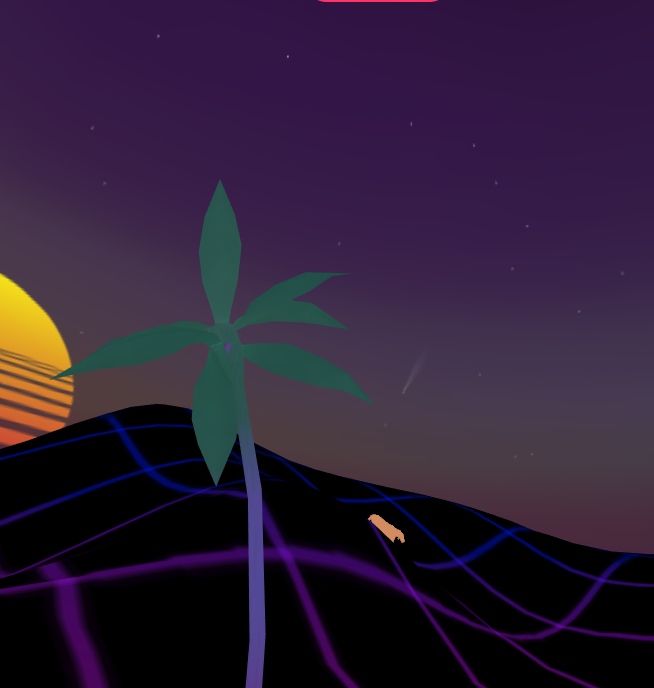
Which leads me to the fact that there is actually a correct star map surrounding the environment. In the real world, you cannot see any stars until the Sun has already set for at least half-an-hour, what you see immediately after sunset is mostly planets. But we are in the virtual world, so I am allowed to apply a bit of an artistic license to what I am trying to show. The comet C/2020 F3 (NEOWISE) was the cosmic object that everyone might remember and associate with 2020. I went to Amboy in the middle of the Mojave desert along Route 66 to observe it. I was able see its long tail stretching between the Big Dipper and the horizon for many hours and it was truly a sight that I will remember. For the virtual one I decided to use a proper star chart, which I found here. I basically truncated the star based on their magnitude and then projected them as ellipses in an SVG file, which then I used in Inkscape along with a mesh gradient to create the artistically-looking sky.

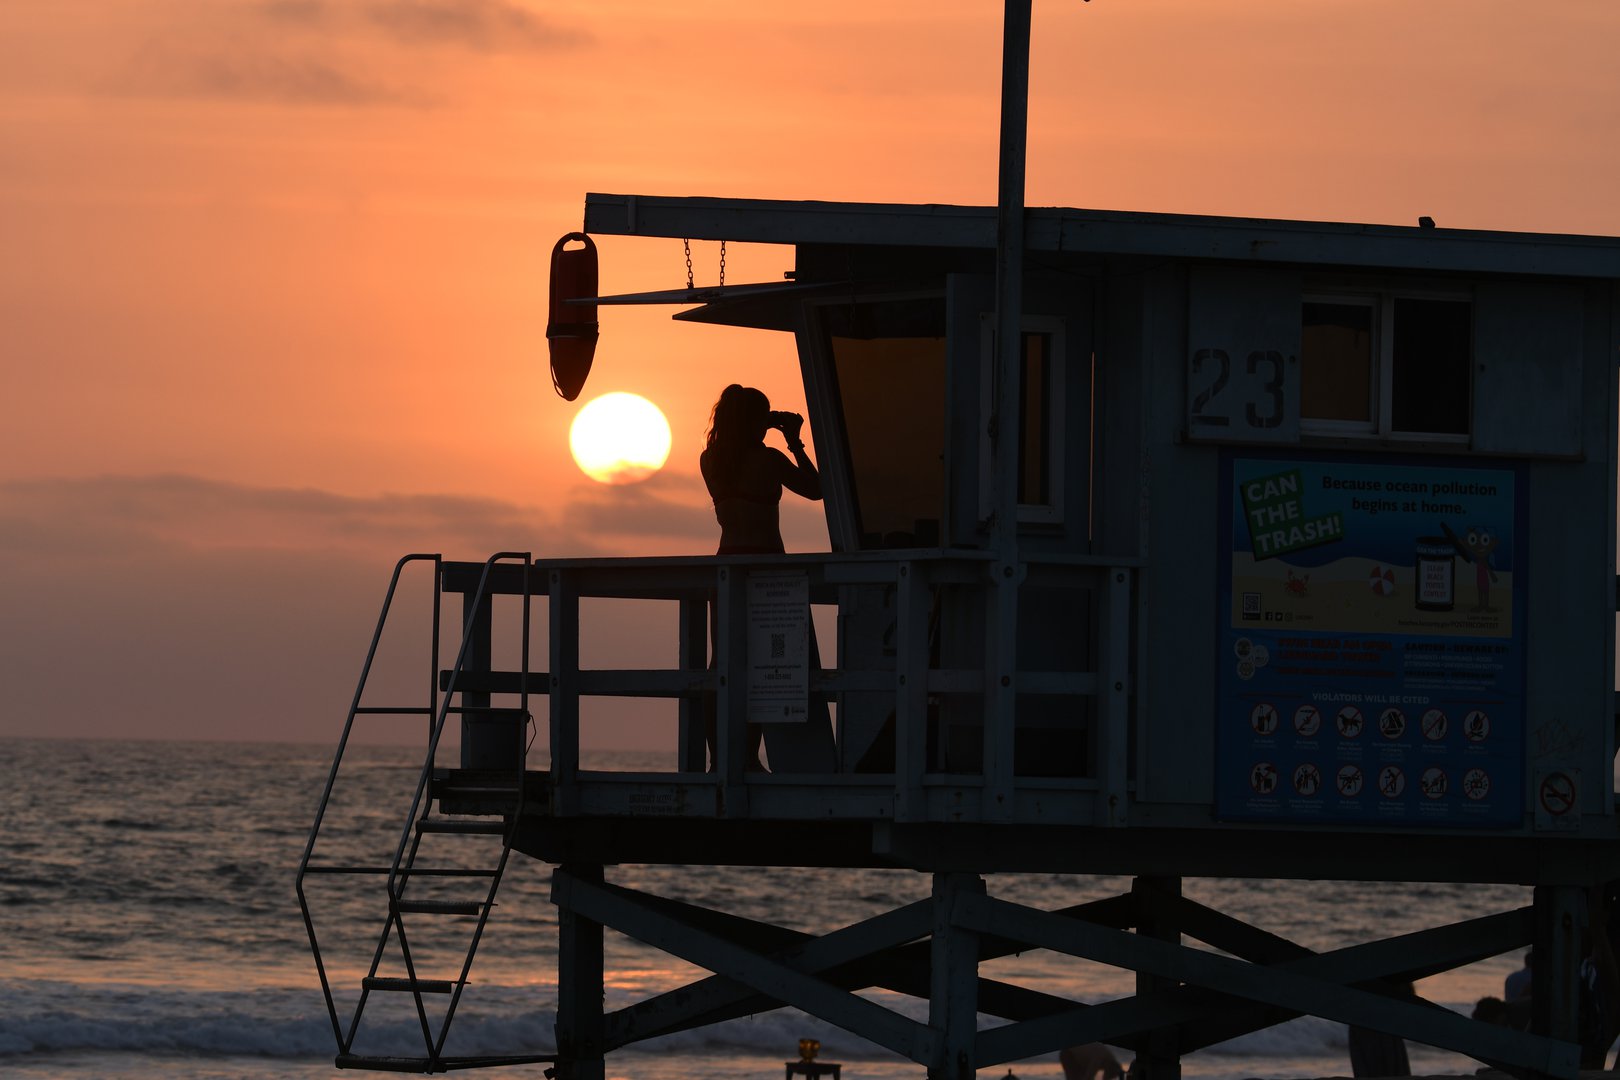
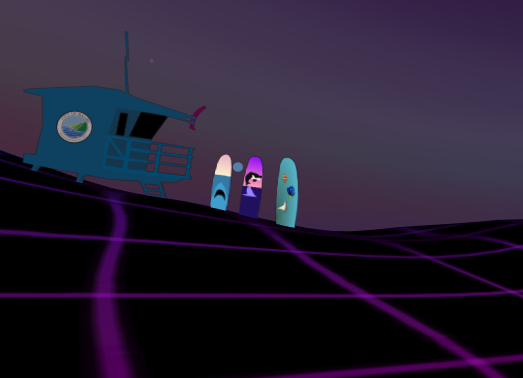
On the opposite side is a lifeguard tower inspired by El Matador in Malibu where it is situated on top of the cliff and oversees the entire beach. Next to it, I decided to add some movie references, they are mostly done as stylized paintings on surf boards - probably the only activity that makes sense in that cold waters of the Pacific Ocean around LA. Jaws is on the left, actually it is an important part of the studio tour at Universal Studios Hollywood. Free Willy was just to contrast it with something more family friendly. And what do we have at the end: one fish, two fish, red fish, blue fish. Nah, the first one is actually a clown fish, but you already get the reference for that particular movie.
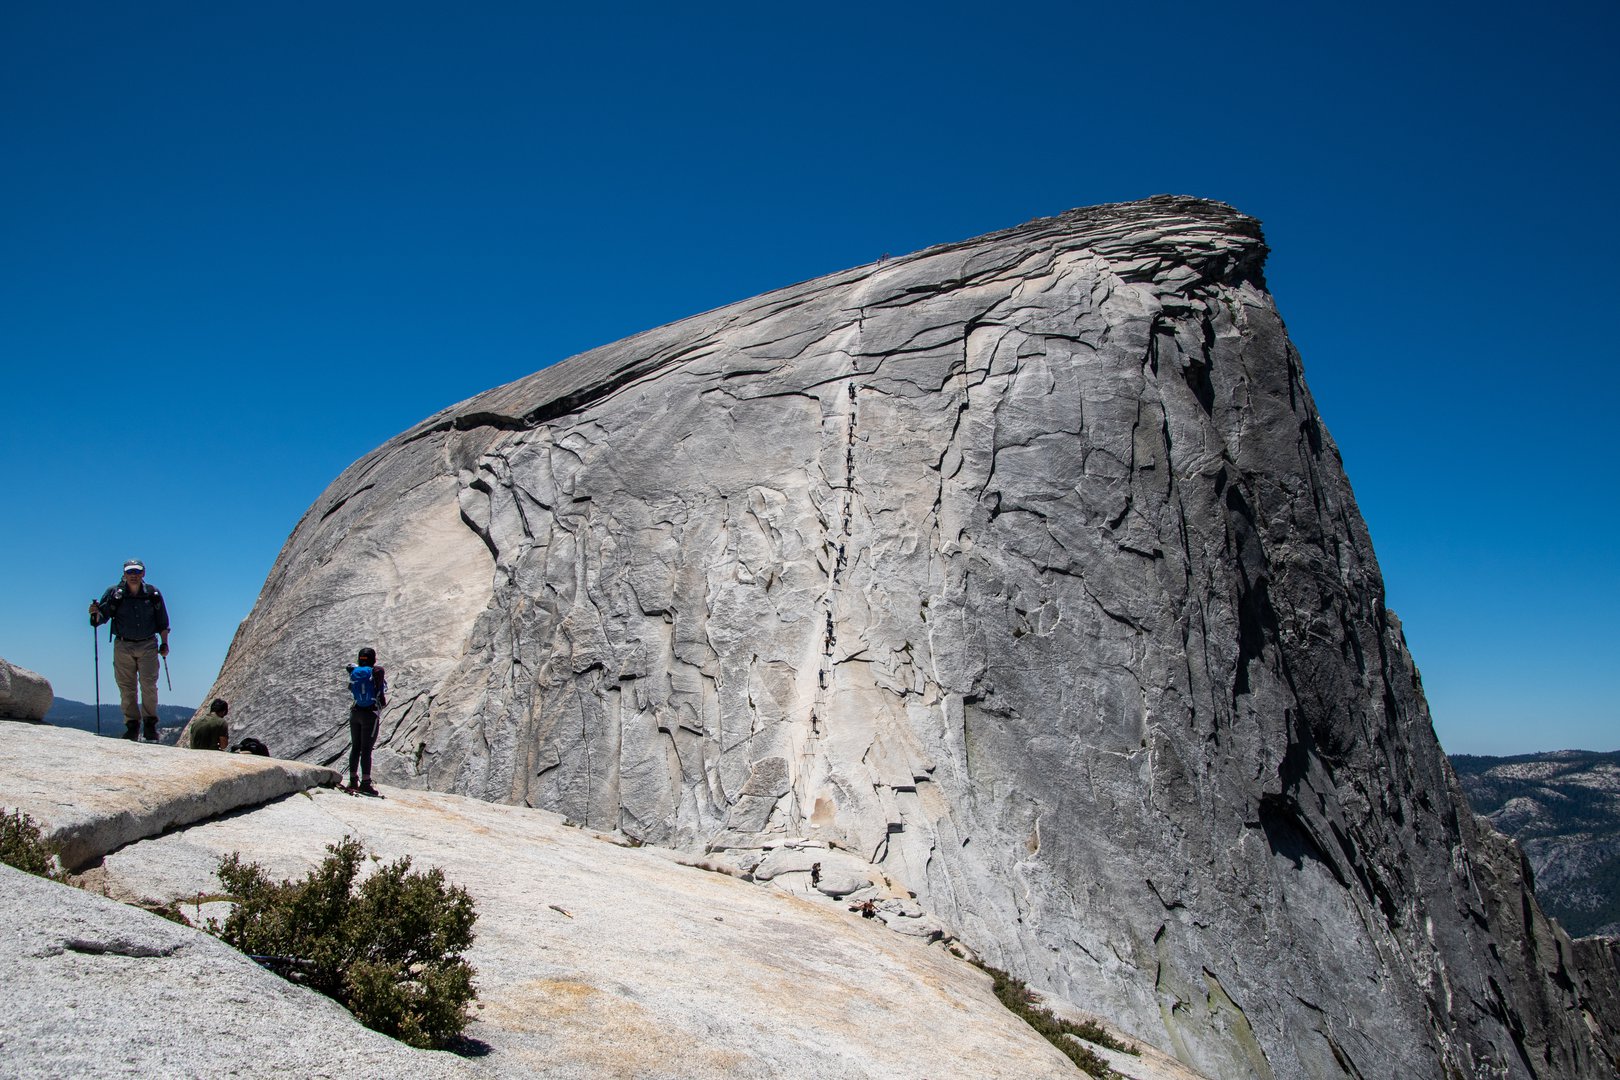
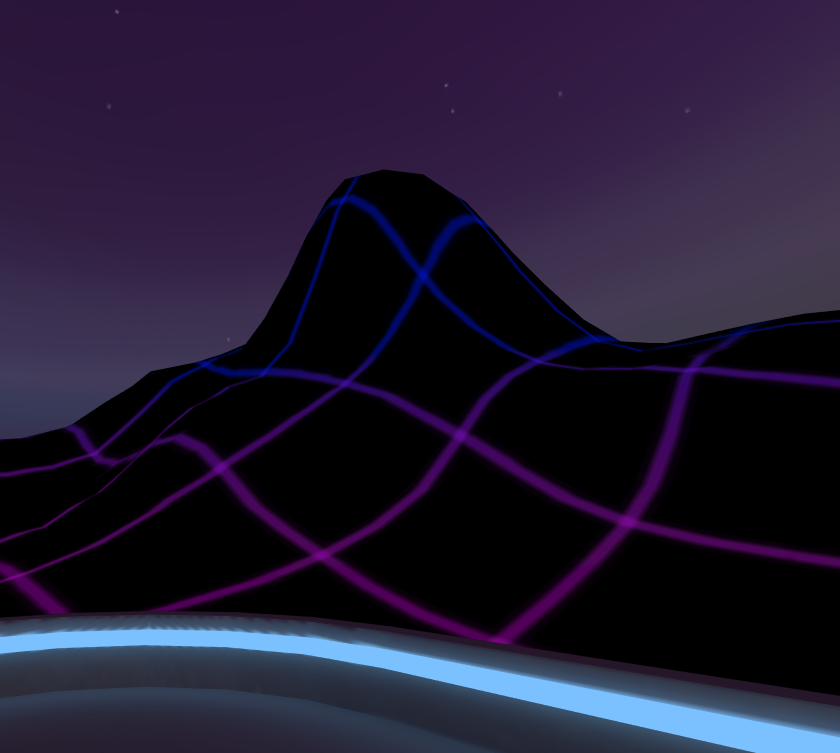
Route 66 continues near I-15 towards Barstow in the real world, but I wanted to sneak some landscape feature that looks like a famous peak, Half Dome in that particular case. I climbed this one in a single day and experienced one of the most breathtaking scenic views, so I had to add it somewhere. I was considering having other symbols, but ultimately it was getting a bit heavy on the memory side (is that pun intended? i don’t know…) and a bit too heavy to render for the browser, so I left it as is.
And of course, Golden Gate bridge in the distance, symbolizing the place that many of us wanted to reach this year.
I hope that you enjoyed that improvised journey, encapsulating some of the experiences that I had this year. Spending that much away from work definitely reminded me that it might be my only chance to see those places and I do not regret doing it, even if it had its own share of risk. Actually, that story acts as a conclusion of another phase in my life. I am eager to see what the next few years hold for me, but for now, I leave USA…
Zdravko Velinov
Graphics Research Person
My research interests cover physically based rendering and digital material acquisition and modeling.